Microphone Is Not Working In Windows 10. How To Easily Fix It.
At first, microphones were used to amplify the human voice to address larger groups of people. The first devices were called megaphones, but today, microphones are useful to record sound, provide speech recognition features, and used to speak with friends, family, and colleagues using various applications and devices.
Most modern laptops have internal microphones and so you do not need to connect additional devices to your computer. Despite the popularity of microphones, many users experience problems with them - microphones not recording sound, unable to use Skype and other similar apps, etc. This problem has become more prevalent after the introduction of Windows 10 Creators update. There are various reasons for microphone problems (internal or external): incorrect drivers installed; issues with the Windows operating system; hardware problems, etc.
First, ensure that the microphone hardware is working and not damaged. Connect the microphone to another computer. It would be even better if the other computer is not running the same operating system version. For example, if you are using Windows 10, we recommend that you test your microphone on a computer running Windows 7, and so on. If the microphone is not working when connected to the other computer, it is likely that the microphone itself is damaged in some way. If possible, connect a different microphone to your current computer and to see if it works. This will help you deduce if the problem is with the computer or microphone. If you are using a desktop computer and an external microphone, try to connect it to the rear port of the computer. In some cases, front ports do not always work.
If you have tried to connect your microphone to another computer and it is working, read the guide below to find out how to fix this problem. The steps also apply to laptop computers with internal microphones.

Table of Contents:
Introduction
Run Windows Troubleshooter
Make Sure That Microphone Is Enabled
Set Your Microphone As A Default Device
Make Sure That Microphone Is Not Muted
Reinstall Or Update Your Microphone Drivers
Restart Windows Audio Service
Restore Your System Using Restore Points
Video Showing How To Make Your Microphone Work In Windows 10
Download Computer Malware Repair Tool
It is recommended to run a free scan with Malwarebytes - a tool to detect malware and fix computer errors. You will need to purchase the full version to remove infections and eliminate computer errors. Free trial available.
Run Windows Troubleshooter
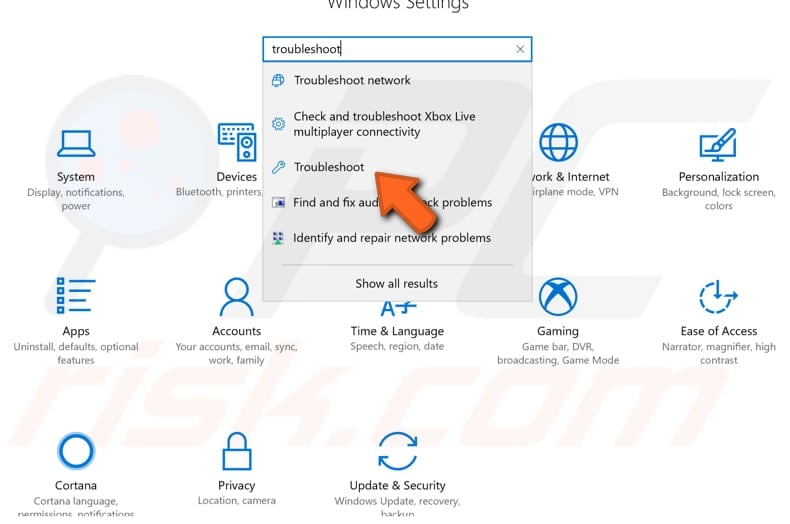
Windows includes a number of troubleshooters designed to quickly diagnose and automatically resolve various computer problems. Troubleshooters cannot fix all problems, but they are a good place to start if you encounter a problem with your computer or operating system, including sound recording problems. To start troubleshooting, go to Settings and type "troubleshoot" and select "Troubleshoot" from the list.
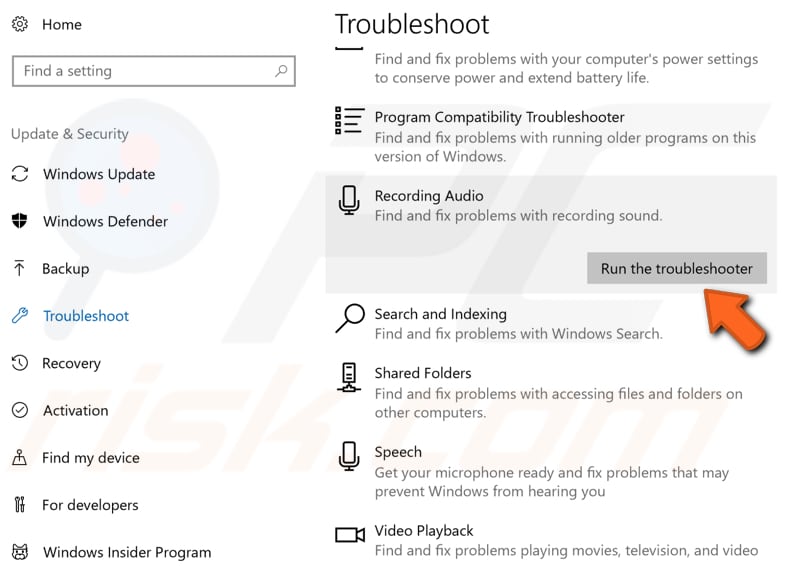
Find "Recording Audio" under "Find and fix other problems" and select it. Click "Run the troubleshooter" and follow the instructions. See if the Windows Update Troubleshooter solves the problem with the external or internal microphone. In addition, run the "Speech" troubleshooter.
[Back to Table of Contents]
Make Sure That Microphone Is Enabled
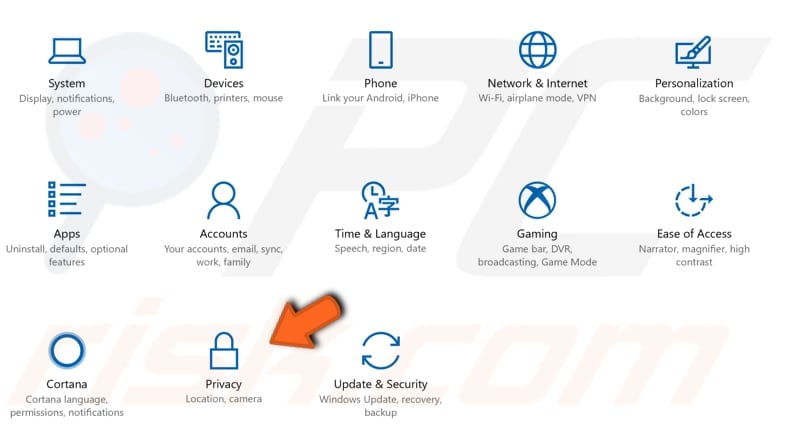
Ensure that your microphone in the Windows 10 operating system is enabled. It is possible that it is simply turned off - the reason why it does not work. To see if it is enabled in Windows, go to Settings, find and click "Privacy".
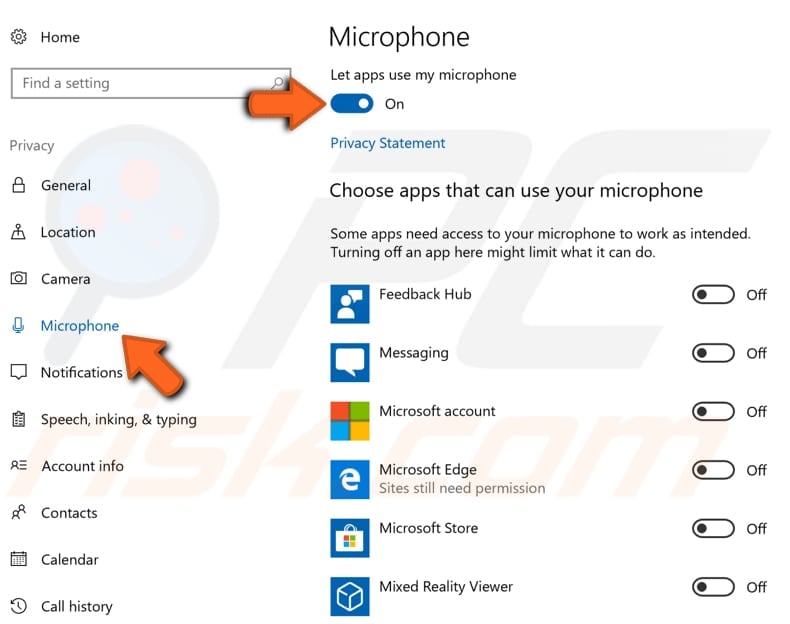
In the Privacy settings window, find and select the "Microphone" section on the left pane. Ensure that the toggle under "Let apps use my microphone" is switched to the "On" position. If you are using your microphone with a particular application, check that you gave that app access to the microphone. Find the app in the list and check that the toggle is switched to the "On" position. See if this solves the problem with the microphone.
[Back to Table of Contents]
Set Your Microphone As A Default Device
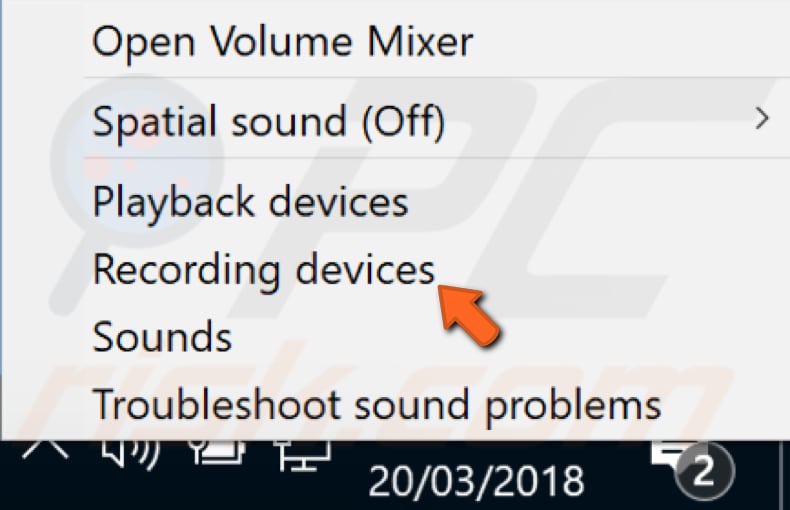
If the external microphone is connected to your computer, this does not necessarily mean that it is set as the default device - you might need to do this manually. To do so, right-click the speaker/volume icon and select "Recording devices" from the contextual menu.
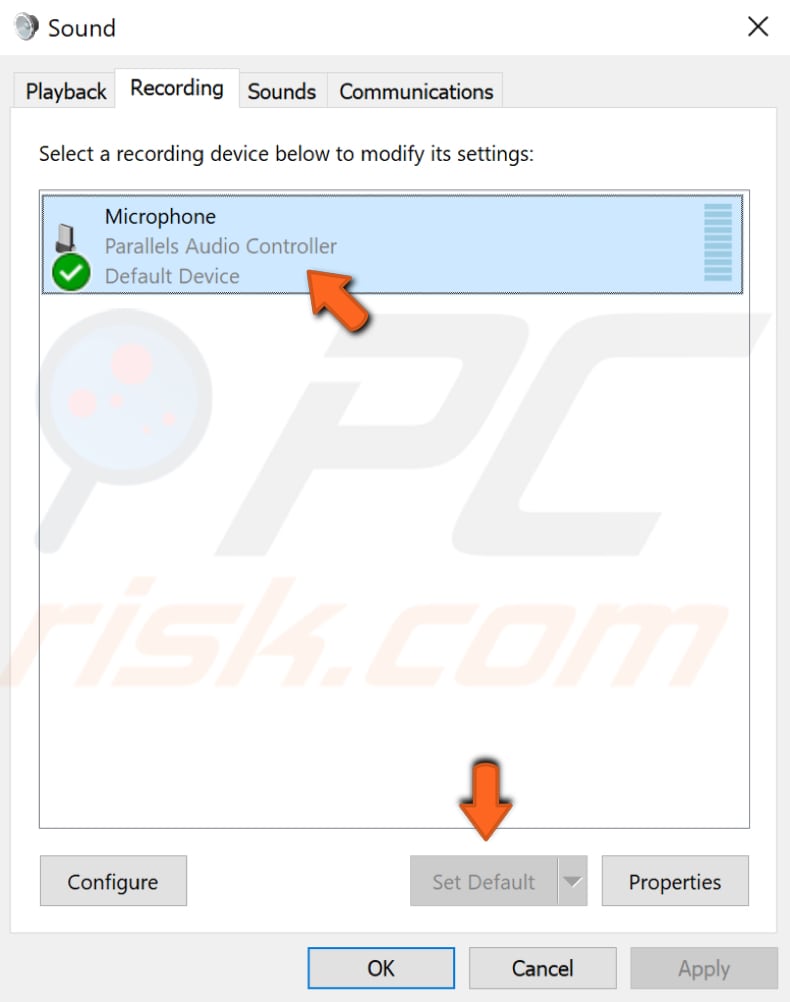
In the Recording tab, select your microphone and then click "Set Default" to set it as the default recording device. Check if this solves the problem with the microphone.
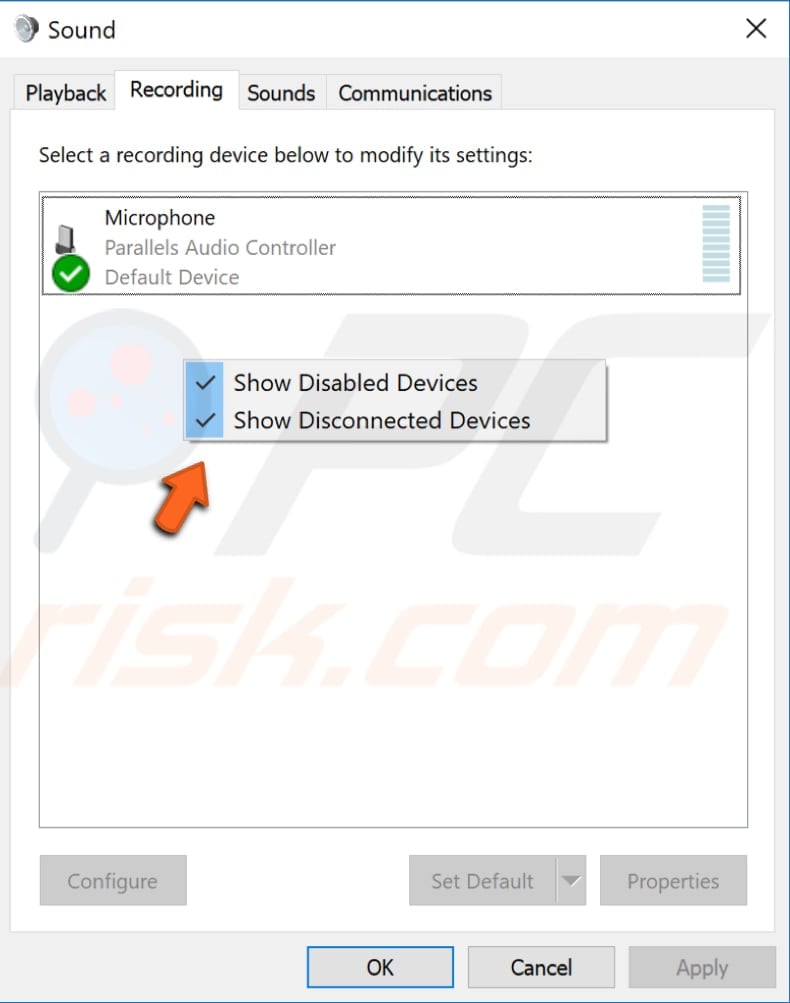
If there is no microphone in the recording devices list, right-click on the empty space in the Recording tab window and enable the "Show Disabled Devices" and "Show Disconnected Devices" options. The microphone should appear and you will be able to set it as the default device by performing the step described previously.
[Back to Table of Contents]
Make Sure That Microphone Is Not Muted
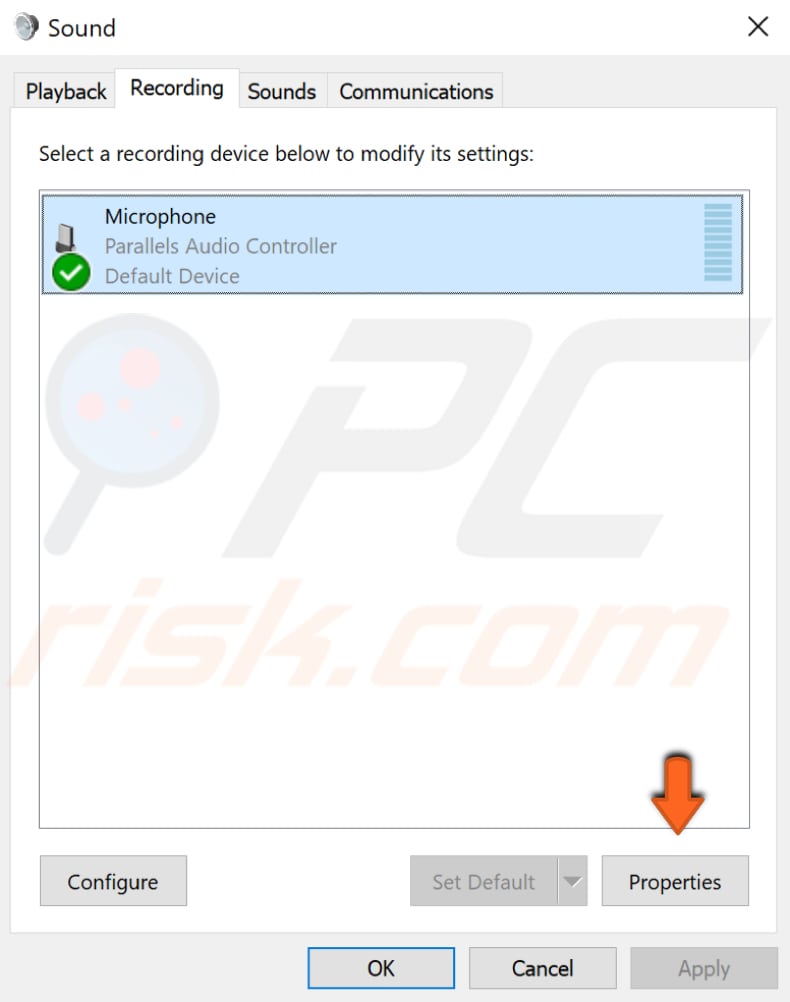
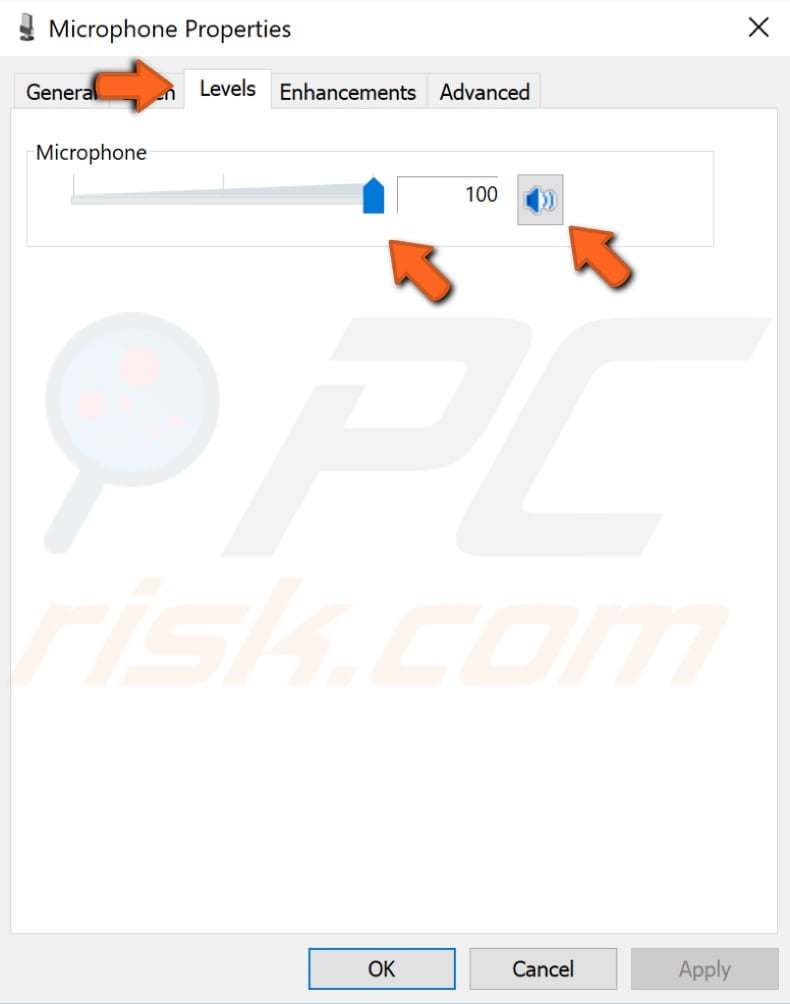
Another reason for a 'microphone problem' is that it is simply muted or the volume set to a minimum. To check, right-click the speaker icon in the Taskbar and select "Recording devices". Select the microphone (your recording device) and click "Properties".
In the Microphone Properties window, click the "Levels" tab and ensure that the speaker icon has no red sign beside it and the volume is set to 100. Check the changes if needed and click "Apply". See if the microphone problem persists.
[Back to Table of Contents]
Reinstall Or Update Your Microphone Drivers
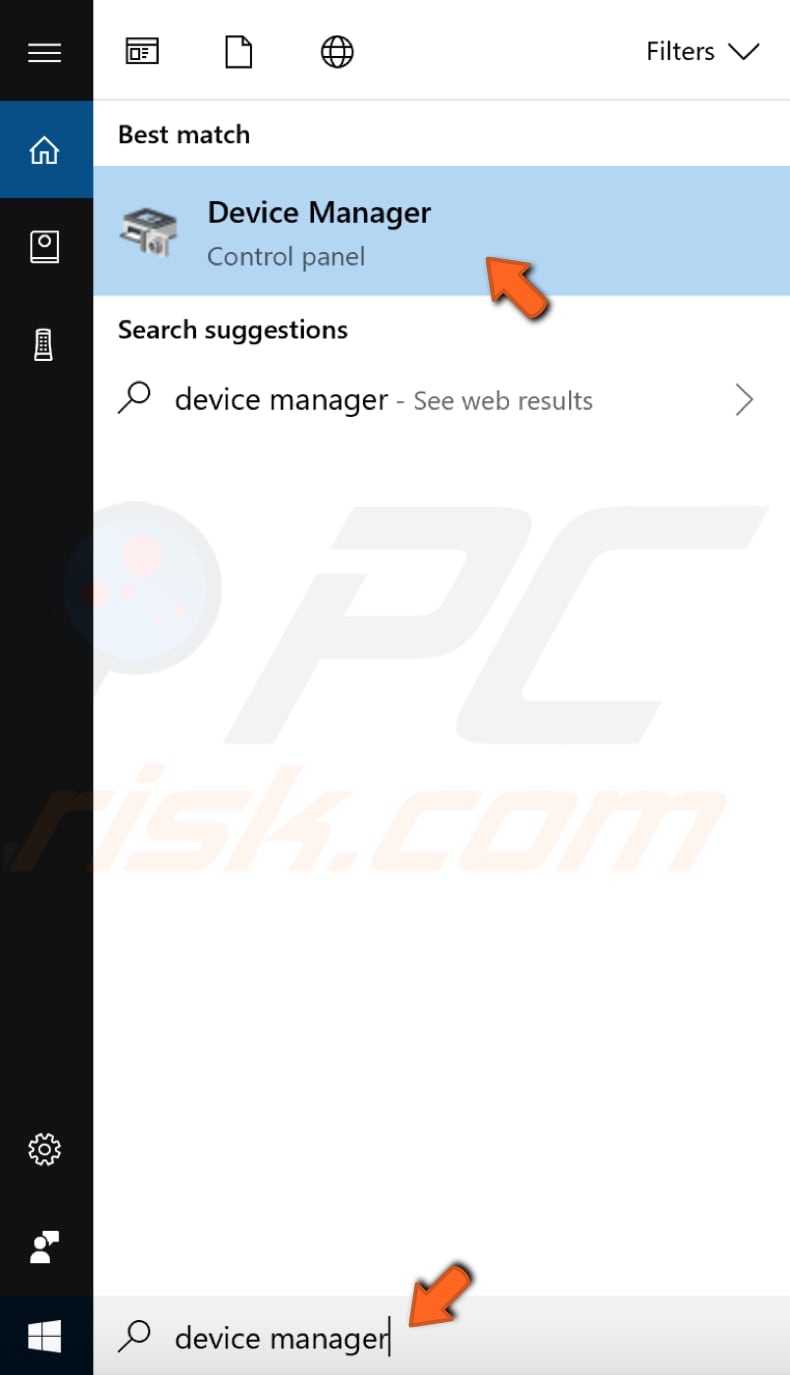
A device driver is software that provides information to the operating system and other software about how to interact with certain hardware. It is rather like a translator between software and hardware, since they often are created by different manufacturers, companies, or individuals. The driver allows software and hardware to communicate smoothly. In most cases, computers are not be able to send and receive data correctly without drivers. If the appropriate driver is not installed, the device might not function properly, if at all. You can try to uninstall and then let Windows to reinstall drivers automatically, or you can try to update drivers manually (or try both methods). To reinstall microphone drivers, type "device manager" in Search and click the "Device Manager" result.
In the Device Manager window, double-click "Audio inputs and outputs" (or click the arrow) to expand that section. Right-click the recording device (your microphone) and select "Uninstall driver" from the contextual menu. Restart the computer and Windows will reinstall the missing drivers.

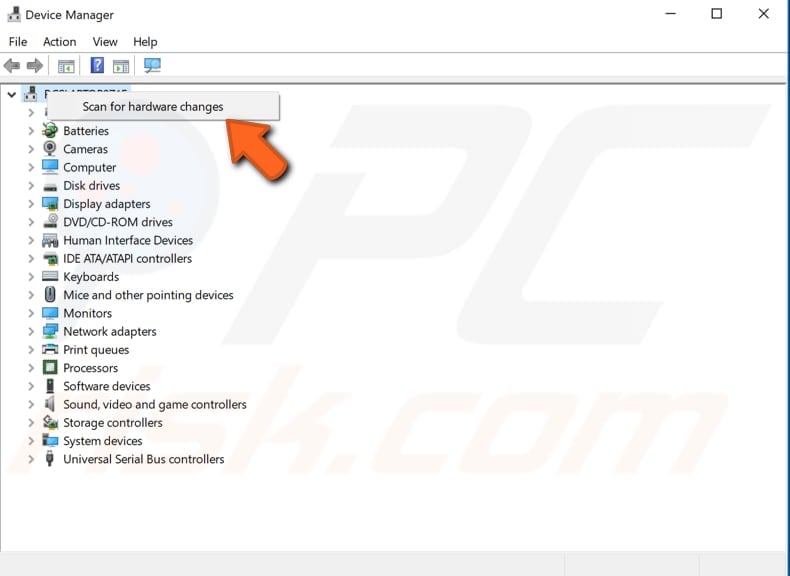
If for some reason Windows fails to reinstall the driver, you can force the system to reinstall by going to Device Manager and right-clicking the computer name (it should be the first one on the list). Select "Scan for hardware changes" and Windows will install the missing drivers.
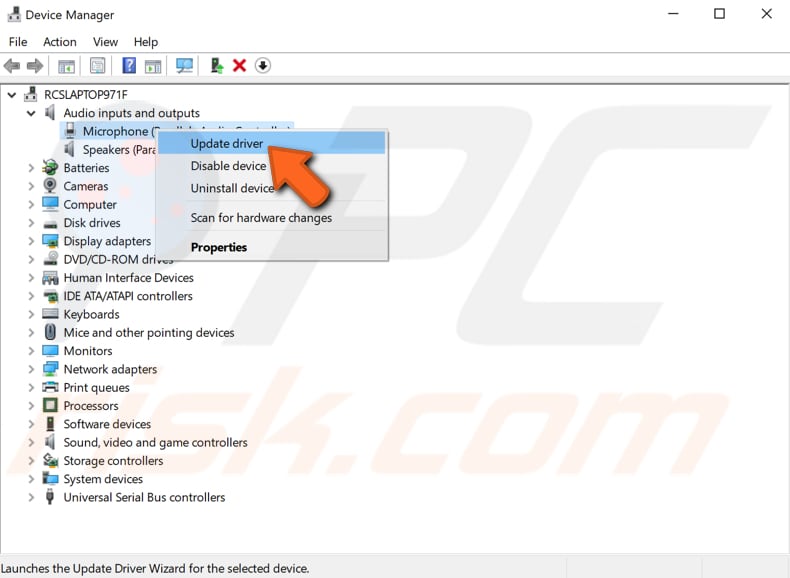
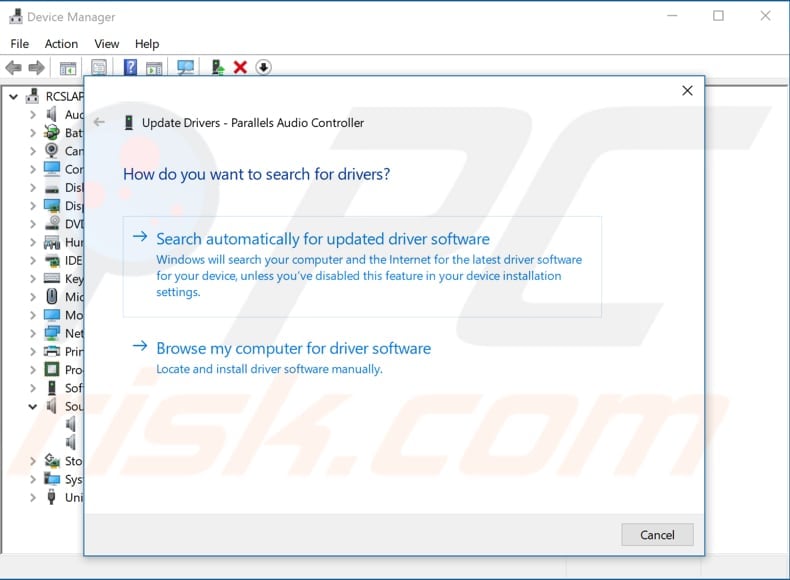
If you want to update your drivers manually or automatically, right-click the recording device in Device Manager and select "Update driver" from the contextual menu.
You will be asked if you want to search for updated driver software automatically or to browse the computer for driver software. If you select the first option, Windows will search the computer and Internet for the latest driver software for your device. If you select the second option, you must locate and install drivers manually. Using this option requires having previously downloaded drivers to the computer or a USB flash drive.
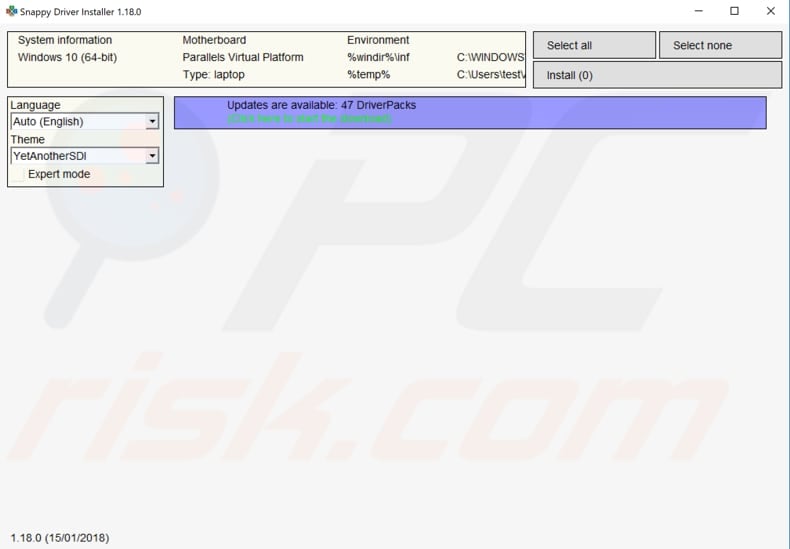
Another way to update or install new drivers for devices is to do it by using third-party software such as Snappy Driver Installer. You will need a computer with a working internet connection to download it.
Snappy Driver Installer (SDI) is a powerful free driver updater tool for Windows that can store its entire collection of drivers offline. Having offline drivers gives Snappy Driver Installer the ability to have access to fast driver updates, even if there is no active Internet connection on your computer. Snappy Driver works with both 32-bit and 64-bit versions of Windows 10, Windows 8, Windows 7, Windows Vista, and also works with Windows XP. Drivers are downloaded through Snappy Driver Installer in 'driverpacks', which are simply collections (packs) of drivers for various hardware such as sound devices, video cards, network adapters, etc. It can also show duplicate drivers and invalid drivers. It separates the updates that require you to restart your computer so that they are easier to distinguish. You can download Snappy Driver Installer from here.
[Back to Table of Contents]
Restart Windows Audio Service
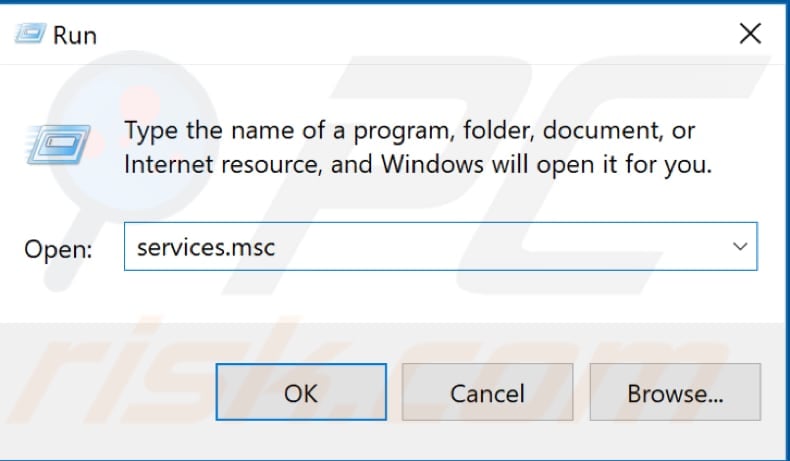
Windows Services (also know as services.msc), are used to modify how Windows services run on your system. These services are responsible for running available programs and managing many system settings and resources. You can modify a service's settings for security, troubleshooting, and performance-related reasons. Windows Audio service manages audio for Windows-based programs. If this service is stopped, audio devices and effects will not function properly. If it is disabled, any services that depend on it will fail to start. To restart Windows Audio services, press the Windows key + R on the keyboard or type run in Search and click the "Run" result to open the Run dialog box. Once it is open, type "services.msc" and press Enter on your keyboard or click "OK".
In the Services window, you will see a list of Windows services. Find "Windows Audio" service and right-click it. Select "Restart" from the contextual menu. Alternatively, you can select "Stop" and then right-click it again and select "Start". Check if this solves the microphone problem.
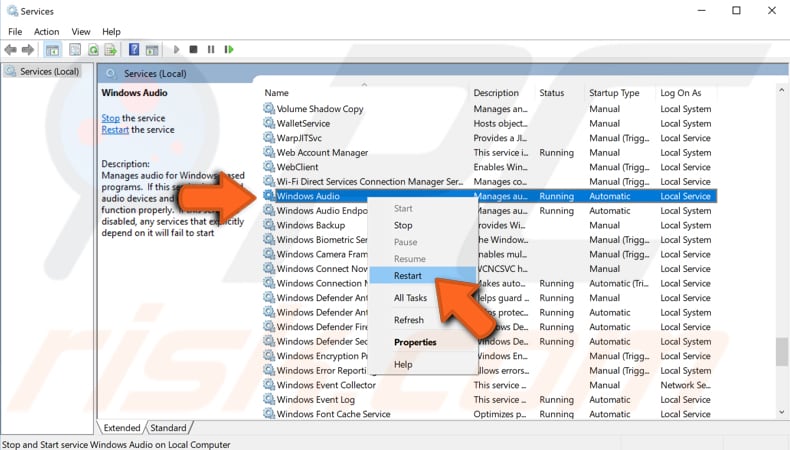
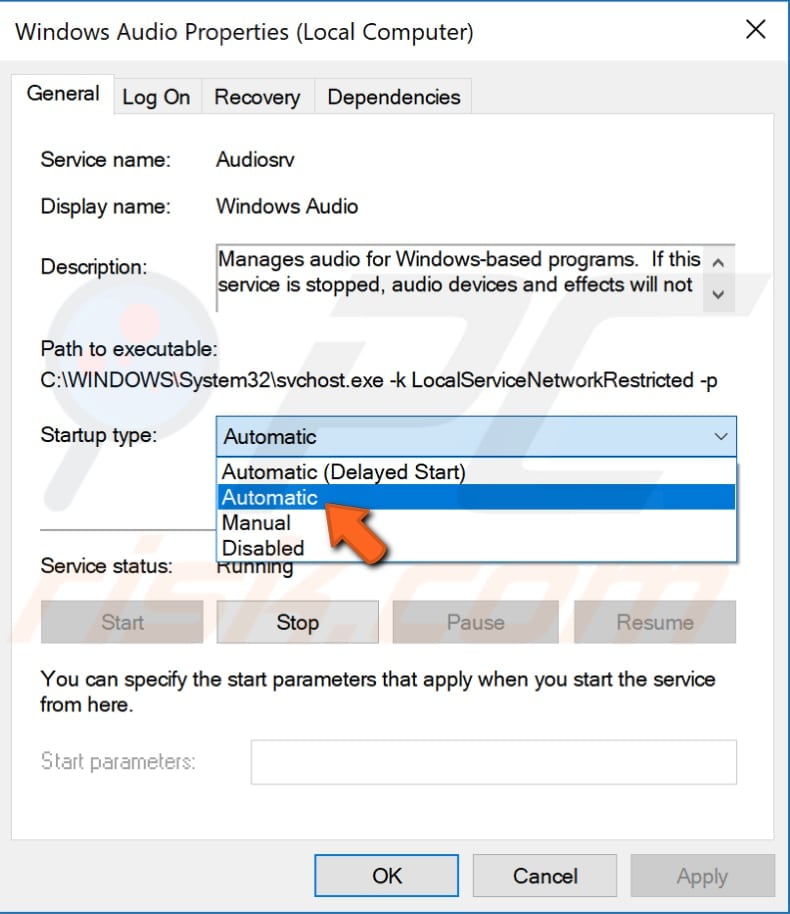
If that does not work, right-click the "Windows Audio" service and select "Properties" from the contextual menu. In the Windows Audio service properties window, check if the "Startup type" is set to "Automatic". If not, set it to Automatic and click "Apply" to save the changes. Restart the computer and see if this solves the problem.
[Back to Table of Contents]
Restore Your System Using Restore Points
The System Restore tool creates restore points. A restore point is a collection of important system files stored by System Restore on a given date and time. System Restore reverts everything to a saved restore point, but first, you must have one recorded. If a restore point does not exist on your computer, System Restore has nothing to revert to. To use this tool, you must have created restore points. With a created restore point, this feature will bring your system back to the previous working state, without affecting your files and data.
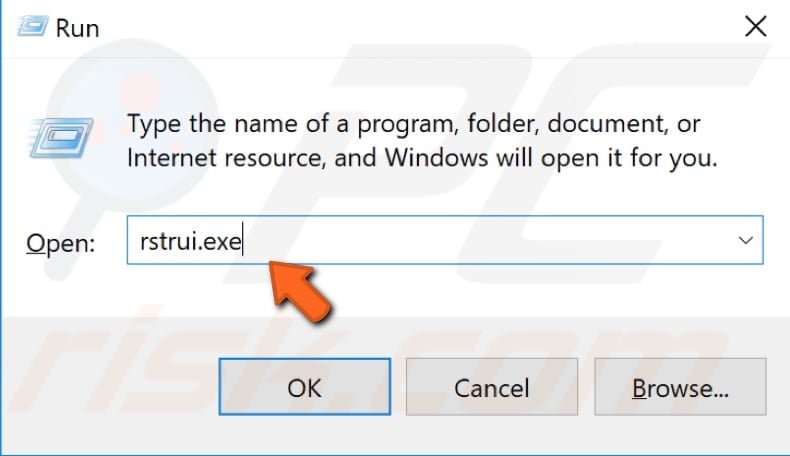
Apply this method only if your microphone stopped working recently. For example, if this problem occurred after you updated Windows. If you have any system restore points that were created before you started experiencing issues with the microphone, you might be able to fix the problem by performing a System Restore. To restore your system, launch Run by pressing the Windows Key + R and type "rstrui.exe". In the Run dialog box, press Enter or click "OK".
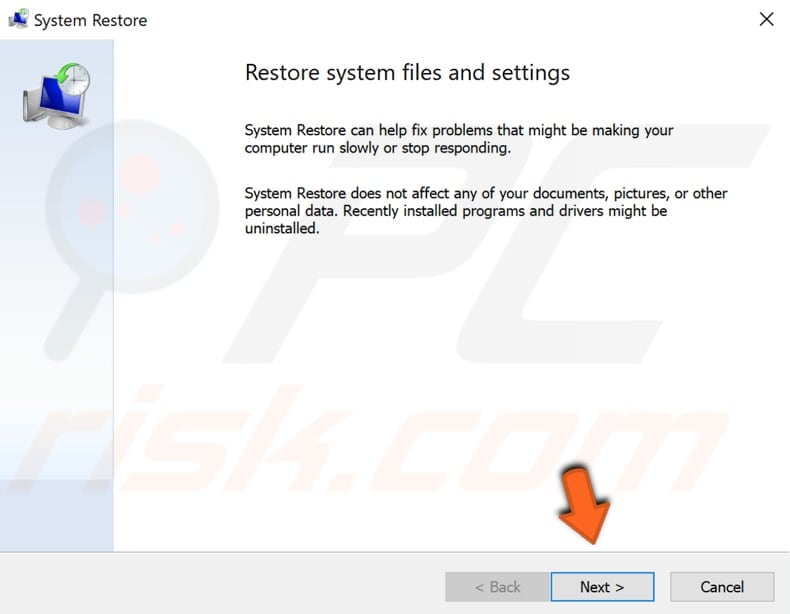
In the System Restore window, click "Next".
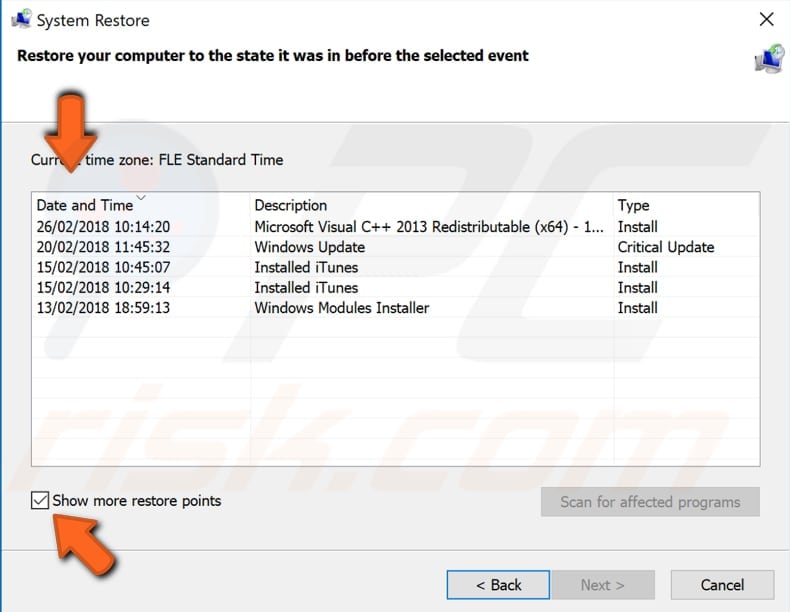
If there are restore points created, you will see a list of them. Mark the "Show more restore points" checkbox. This should display more restore points. Select the most appropriate restore point (depending on the time created, etc.) and click "Next". Do not select a Restore Point at a time when the problems with your microphone were already present - you certainly do not want to revert to that state.
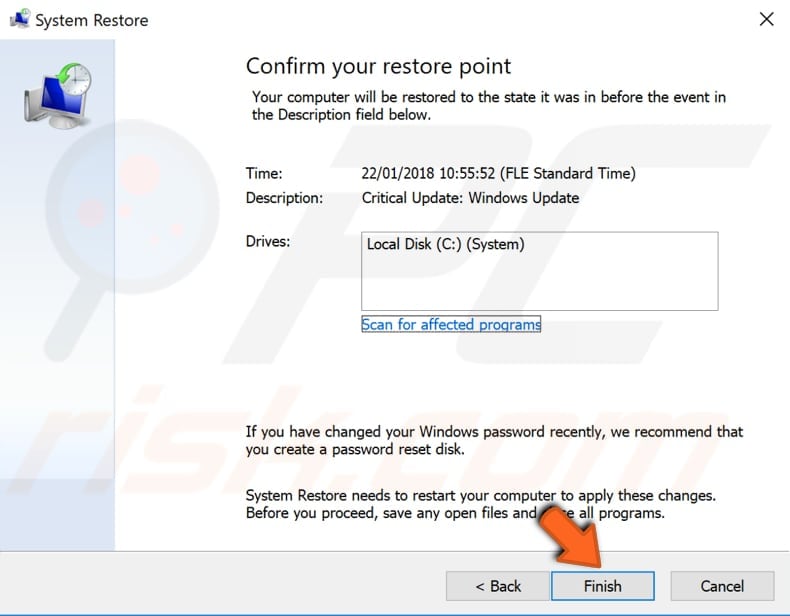
Confirm the restore point. Your computer will be restored to the state prior to the event detailed in the "Description" field. If you are happy with your choice, click "Finish" and the system restore process will begin.
We hope that this guide was helpful and you are able to solve the problem with your microphone. If you know of another method that solved this problem, not mentioned in our guide, please share it with us by leaving a comment in the section below.
Comments
Post a Comment